


Eternal Update: Ultimate Tower Blitz Tower Tier List
In *Tower Blitz*, you start with a single tower, but as you progress, you'll unlock a diverse array of towers, each with unique strengths and weaknesses. To help you strategize effectively and tailor your gameplay, we've compiled a comprehensive tier list of all the towers in *Tower Blitz*.
All Towers in Tower Blitz Ranked
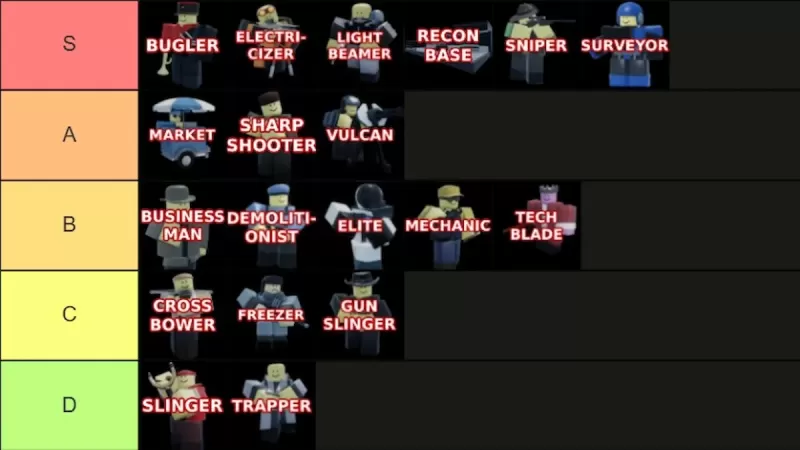 Image by The Escapist. We've ranked all the towers in the game from S-Tier to D-Tier, taking into account their abilities, upgrade paths, cost, and overall efficiency. **S-Tier** towers are the cream of the crop, almost guaranteeing victory on any map if used correctly. **A-Tier** towers are strong but have notable flaws that keep them from the top. **B-Tier** towers are average, neither exceptional nor terrible. **C-Tier** towers are generally underwhelming, though they might have some niche uses. **D-Tier** towers are the least effective and should be avoided in most scenarios. Below, we'll explain our rankings in detail.
S-Tier Towers
| Tower | Cost | Explanation | Pros and Cons |
|---|---|---|---|
 | To unlock the tower: **2500 Tokens** (available at Level 25) To place in-game: **750 Cash** | The Bugler is incredibly powerful, though strictly a support tower. It's essential for Expert mode and boosts the performance of other towers. Note that it cannot buff Recon Bases. | + Significantly enhances other towers' performance + Essential for Expert mode – Limited to support role |
 | To unlock the tower: **5500 Tokens** To place in-game: **3800 Cash** | For those who prefer a more powerful Sniper, the Electricizer offers the game's largest range and damage. Position it at the end of the map for maximum impact. | + High power and extensive range + Versatile in support and damage – High cost |
 | To unlock the tower: **Complete the contract** To place in-game: **1800 Cash** | The Lightbeamer is one of the strongest towers in the game. Its death ray excels in straight paths and can handle almost any enemy. Both upgrade paths are excellent and can carry your game with the right placement. | + Extremely powerful + Excellent for crowd control – Not viable early in the game – Expensive |
 | To unlock the tower: **8000 Tokens** (available at Level 45) To place in-game: **1000 Cash** | The Recon Base offers great value by spawning multiple operatives that fight on your behalf. Both upgrade paths are strong, making it a key asset for Expert mode, despite its expensive upgrades. | + Continually spawns units + Both paths are highly effective + Ideal for Expert mode – Very costly upgrades |
 | To unlock the tower: **1500 Tokens** To place in-game: **500 Cash** | The Sniper is the best early-game tower, though some may find it slow. The bottom path can improve its speed, and it remains useful throughout the game, especially in Expert mode. | + Top early-game tower + Useful throughout the game + High piercing damage – Slightly slow |
 | To unlock the tower: **Complete the contract** To place in-game: **700 Cash** | The Surveyor is incredibly versatile. Choose the top path for support or the bottom for direct damage. It's effective from start to finish and plays a crucial role in any round. | + Highly adaptable + Usable from start to finish – Limited to four placements |
A-Tier Towers
| Tower | Cost | Explanation | Pros and Cons |
|---|---|---|---|
 | To unlock the tower: **1000 Tokens** To place in-game: **650 Cash** | The Market is a great tower if you master its mechanics. Avoid the bottom path's investing trap and focus on the top path for steady income generation, crucial in all game modes, especially multiplayer. | + Essential for income in all games, especially multiplayer + Profitable – Bottom path not effective – Slow initial money generation |
 | To unlock the tower: **1300 Tokens** To place in-game: **600 Cash** | The Sharpshooter excels early in the game, handling groups of enemies efficiently. Its range covers early needs, though its piercing damage is low. It's perfect for beginners transitioning into mid-game. | + Effective crowd control and damage + Great for beginners – Not suitable for Expert mode – Low defense piercing |
 | To unlock the tower: **3000 Tokens** To place in-game: **2500 Cash** | The Vulcan is a solid choice for mid to late-game. Opt for the bottom path for maximum strength, which can offer up to 140 DPS and full defense pierce at max level. Be patient as it takes time to reach its full potential. | + Highly effective at max level + Versatile in function – Slow to become strong – No detection for flying enemies |
B-Tier Towers
| Tower | Cost | Explanation | Pros and Cons |
|---|---|---|---|
 | To unlock the tower: **Complete the contract** To place in-game: **800 Cash** | The Businessman helps farm money and deals damage, making it a decent early-game option. It synergizes well with the Recon Base, but it's outclassed by other towers in terms of profitability and damage potential. | + Generates money and deals damage + Suitable for early game – Easily replaced by better options |
 | To unlock the tower: **3500 Tokens** To place in-game: **900 Cash** | The Demolitionist is effective early on with good crowd control and piercing damage. However, it quickly becomes obsolete as better options emerge, and it lacks detection for flying enemies. | + Effective crowd control and piercing damage – Not useful beyond early game – No flying enemy detection |
 | To unlock the tower: **Complete the contract** To place in-game: **1200 Cash** | The Elite is similar to the Vulcan but less versatile. The bottom path is your best bet, though its long cooldown can be a hindrance. It's expensive, so use it wisely. | + Strong bottom path – Long cooldown – Expensive |
 | To unlock the tower: **Complete the contract** To place in-game: **480 Cash** | The Mechanic is effective in mid-game but lacks impact in early and late stages. Its Tesla turrets are the only notable feature, but the tower's cost doesn't justify its limited utility. | + Useful in mid-game – Not cost-effective |
 | To unlock the tower: **Free** (available at Level 10) To place in-game: **400 Cash** | The Techblade is a melee tower effective against early-game enemies and groups. Its small range and slow attack speed limit its effectiveness, though it can handle tanks. | + Good for crowd control + Effective early game – Limited range – Slow attack speed |
C-Tier Towers
| Tower | Cost | Explanation | Pros and Cons |
|---|---|---|---|
 | To unlock the tower: **200 Tokens** To place in-game: **400 Cash** | The Crossbower is a decent choice for beginners or as an early-game alternative to the Slinger. Its long range is its main advantage, but its low damage throughout upgrades limits its utility. | + Affordable and suitable for beginners + Long range – Not useful beyond early game – Low damage output |
 | To unlock the tower: **450 Tokens** To place in-game: **400 Cash** | The Freezer can be useful when paired with high-DPS towers, especially against fast enemies. However, once enemies gain freeze immunity, it becomes obsolete. Better tower combinations are available at this stage. | + Effective against fast enemies – Becomes useless after early game – Limited enemy types it can handle |
 | To unlock the tower: **500 Tokens** To place in-game: **400 Cash** | The Gunslinger is another melee tower with poor range and speed. The top path can improve range but at the cost of damage. It's only viable in Normal mode. | + Decent top path – Very short range – Not usable in Hard or Expert modes |
D-Tier Towers
| Tower | Cost | Explanation | Pros and Cons |
|---|---|---|---|
 | To unlock the tower: **Free** To place in-game: **200 Cash** | The Slinger is ideal for beginners to get accustomed to the game. It's useful only in the first few waves and should be replaced quickly due to its poor damage and slow firing rate. | + Free to unlock – Poor damage and firing speed even at max level – Useless after the initial waves |
 | To unlock the tower: **1000 Tokens** (available at Level 10) To place in-game: **500 Cash** | The Trapper is surprisingly weak for its cost and level requirement. It struggles to defeat even the weakest enemies, making it an inefficient choice when compared to other, more effective towers. | + Decent bottom path – Not cost-effective – Often nearly unusable – Struggles throughout the game |
With this detailed tier list, you're equipped to find the best strategy that suits your play style in *Tower Blitz*. If you're looking for a boost to get started, our *Tower Blitz* codes can give you the edge you need.
-
 Dec 25,24Zenless Zone Zero 1.5 Update Preview Zenless Zone Zero Version 1.5 Update: Leaked Banner Characters Revealed New leaks for Zenless Zone Zero unveil the character lineup for the upcoming Version 1.5 update, including highly anticipated character reruns. This HoYoverse action RPG continues to expand its roster of powerful characters, fr
 -
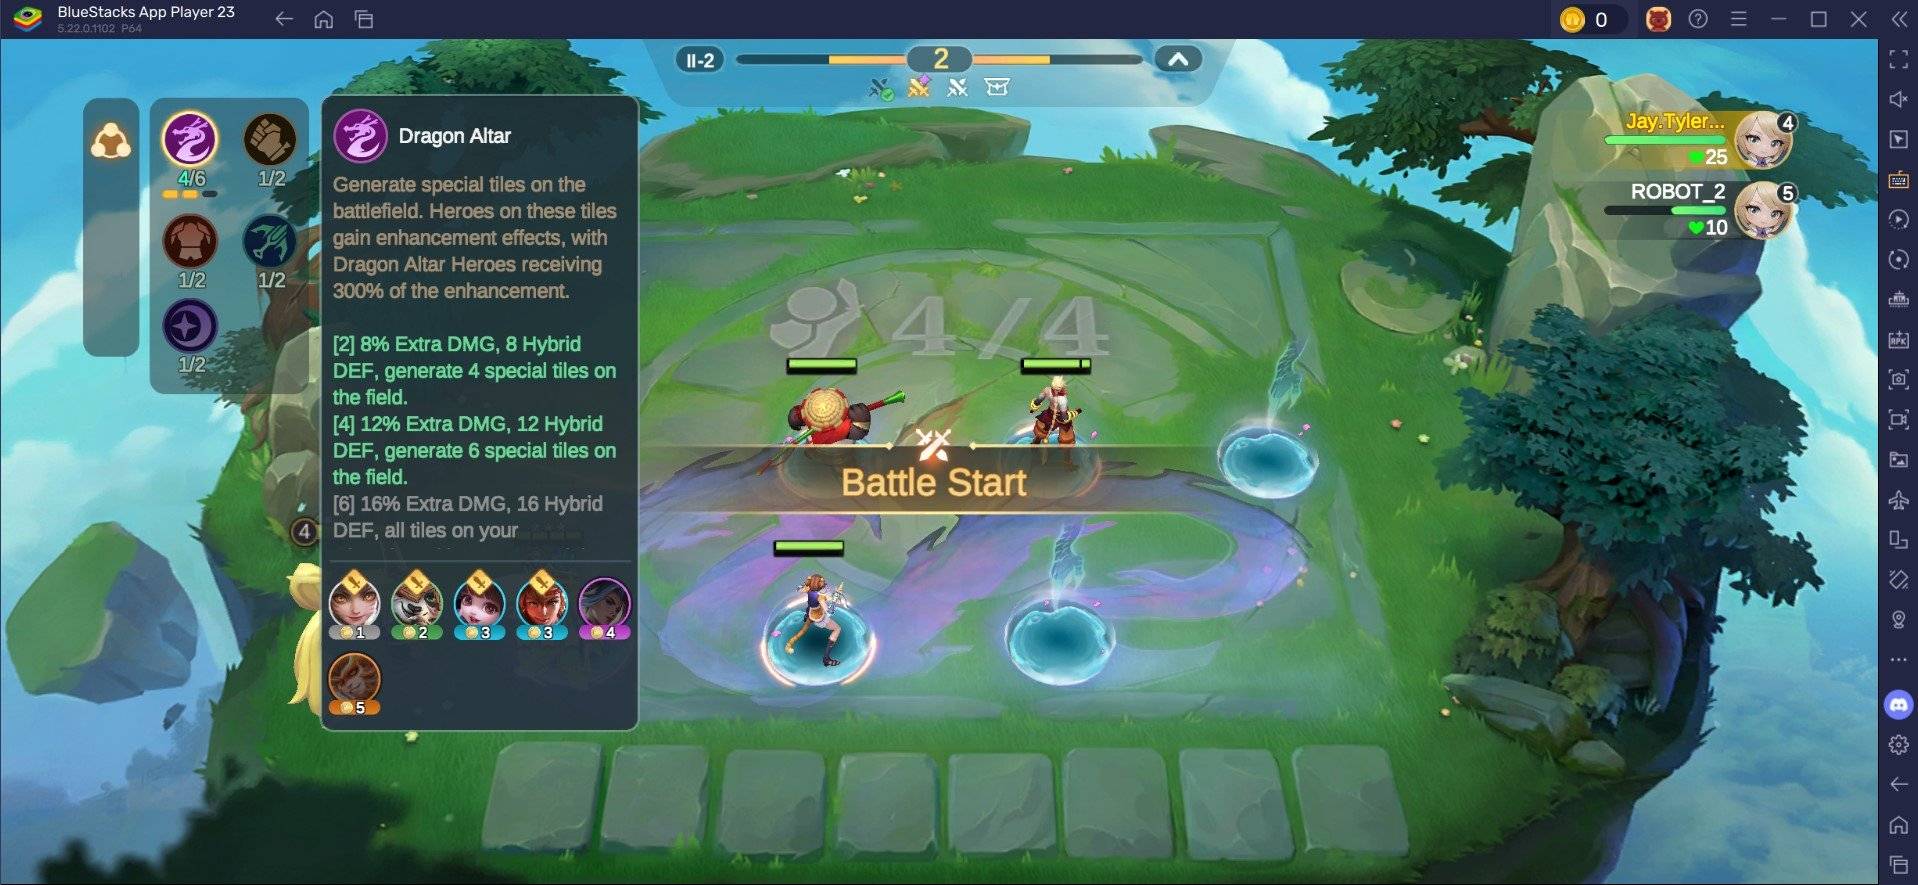 May 06,25Magic Chess: Beginner's Guide to Mastering Core Mechanics Magic Chess: Go Go, an exhilarating auto-battler strategy game crafted by Moonton, is deeply rooted in the vibrant universe of Mobile Legends. This game masterfully blends chess tactics with hero-based strategies, offering players the chance to craft formidable team line-ups featuring heroes from th
 -
 Apr 08,25Top Free Fire Characters 2025: Ultimate Guide Free Fire, crafted by Garena, has cemented its status as a top-tier battle royale game worldwide, amassing over 1 billion downloads on the Google Play Store and engaging millions of daily active players. Its appeal lies not only in its thrilling gameplay but also in its diverse array of characters,
 -
 Jan 18,25Roblox Grace: All Commands and How to Use Them Grace 游戏指令速查 所有 Grace 指令 如何使用 Grace 指令 Grace 是一款 Roblox 游戏,玩家需要在充满恐怖生物的各个关卡中生存。游戏极具挑战性,需要玩家快速反应并寻找对抗敌人的方法。幸运的是,开发人员添加了测试服务器功能,玩家可以使用聊天指令来简化游戏,召唤敌人,或进行游戏测试。以下列出了 Grace 游戏中的所有指令以及使用方法。 所有 Grace 指令 .revive:复活指令,用于在失败或卡住时重新进入游戏。 .panicspeed:修改计时器速度。 .dozer:召唤 Dozer 实体。 .main:进入主分支服务器。 .slugfish:召唤 S