


16 Cutting-Edge Warding Strategies from Pro Players in Dota 2's Latest Patch
In the dynamic world of Dota 2, mastering vision control is crucial, and with each new patch, strategies evolve. Recently, Adrian, a renowned guide creator, shared a comprehensive video on his YouTube channel, highlighting innovative warding techniques used by professionals at DreamLeague S25. At PC Gamer, we've delved deep into these strategies, offering an in-depth analysis of 16 groundbreaking ward placements, along with alternative suggestions to enhance your gameplay.
As the Dota 2 community adjusts to the latest patch, top-tier teams are redefining the potential of Observer wards. These placements are meticulously chosen to maximize their strategic value while minimizing the chance of being spotted. Here, we break down these innovative ward spots, providing detailed insights and alternate options to help you dominate the battlefield.
Table of Contents:
- Mid Lane Jungle Extension
- Radiant Ancient Riverbank
- Dire Top Tier 2 Bushes
- Radiant Bottom Secret Shop Monitor
- Dire Bottom Tier 2 Fog Corner
- Radiant Roshan Pit Entrance
- Dire Mid Lane High Ground
- Radiant Top Tier 2 Backdoor Path
- Dire Bottom Ancient River Bend
- Radiant Mid Lane Jungle Passage
- Dire Top Secret Shop Approach
- Radiant Bottom Tier 3 Side Path
- Dire Roshan Pit Exit
- Radiant Top Ancient Cliffside
- Dire Mid Lane Jungle Overlook
- Radiant Bottom Tier 2 Rear Flank
Mid Lane Jungle Extension
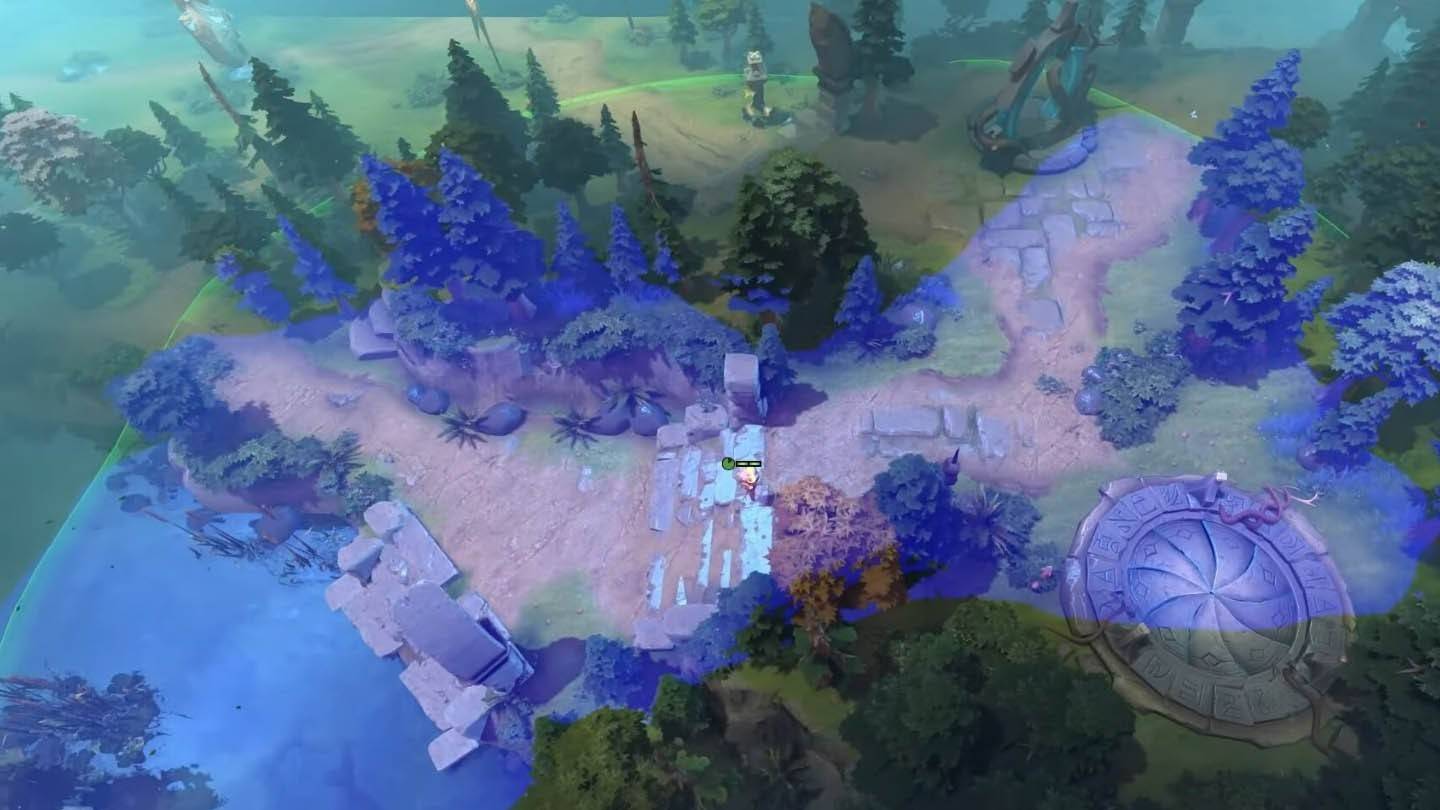
Image: ensigame.com
Early Game Domination: This ward is placed deeper than traditional mid lane jungle wards, providing unmatched vision over key areas early in the game. It not only secures runes but also gives critical insights into enemy movements through the jungle.
Alternative: A slight shift towards the Radiant side can enhance coverage over the secret shop approach.
Radiant Ancient Riverbank
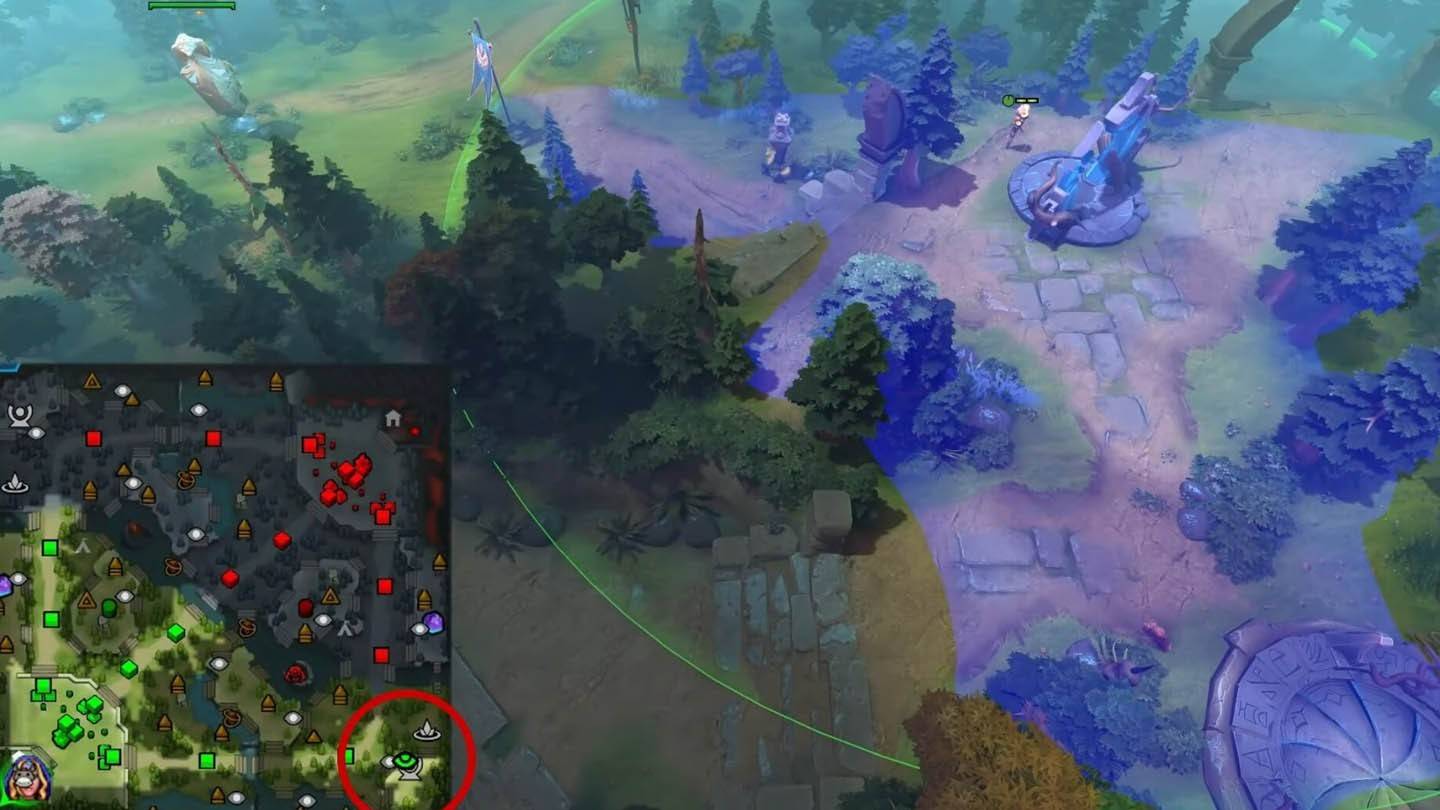
Image: ensigame.com
Strategic Depth: This ward offers deep vision into the Radiant's base from an unexpected angle. Its clever positioning makes it difficult for enemies to find and destroy, ensuring prolonged effectiveness.
Bonus Tip: Pair this with a Sentry ward nearby for a robust defensive setup.
Dire Top Tier 2 Bushes
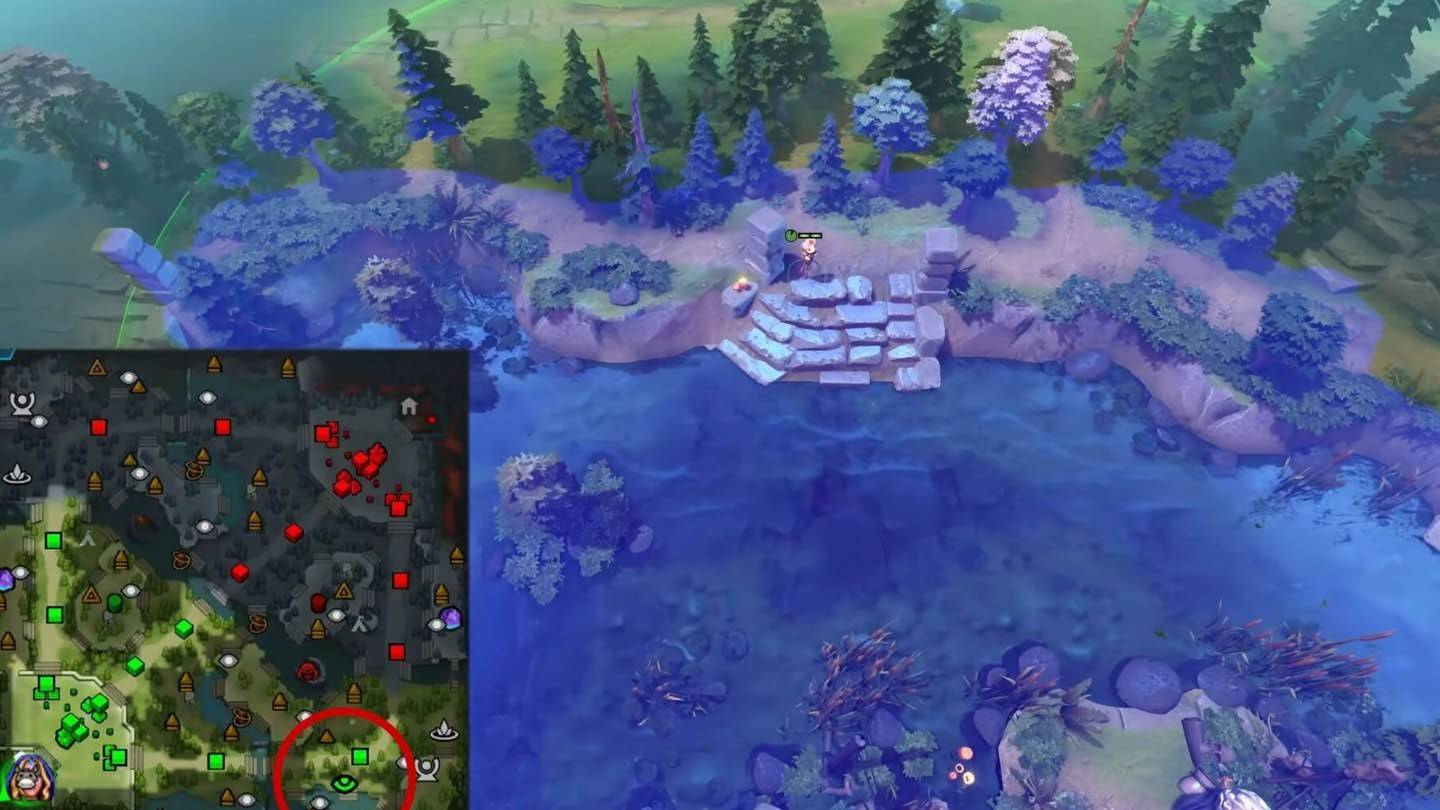
Image: ensigame.com
Tower Protection: By revealing critical areas around the Dire's second tier towers, this ward aids in both defense and offensive positioning, particularly effective during teamfights near these structures.
Pro Tip: Rotate this ward periodically to avoid predictable patterns.
Radiant Bottom Secret Shop Monitor
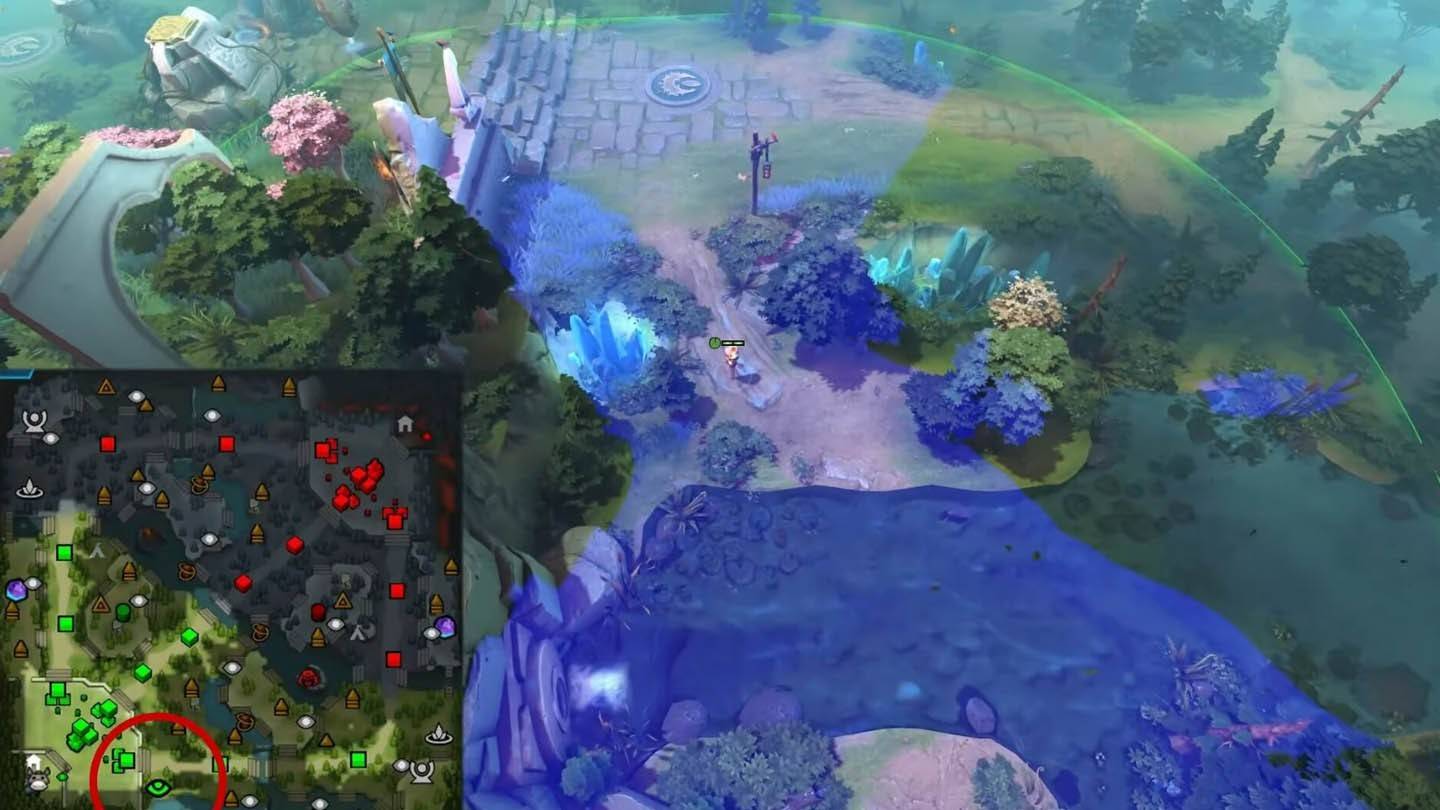
Image: ensigame.com
Economic Intelligence: This placement allows you to monitor enemy heroes using the secret shop, providing valuable information about item purchases and timing.
Advanced Strategy: Combine this with vision denial wards to disrupt potential buybacks.
Dire Bottom Tier 2 Fog Corner
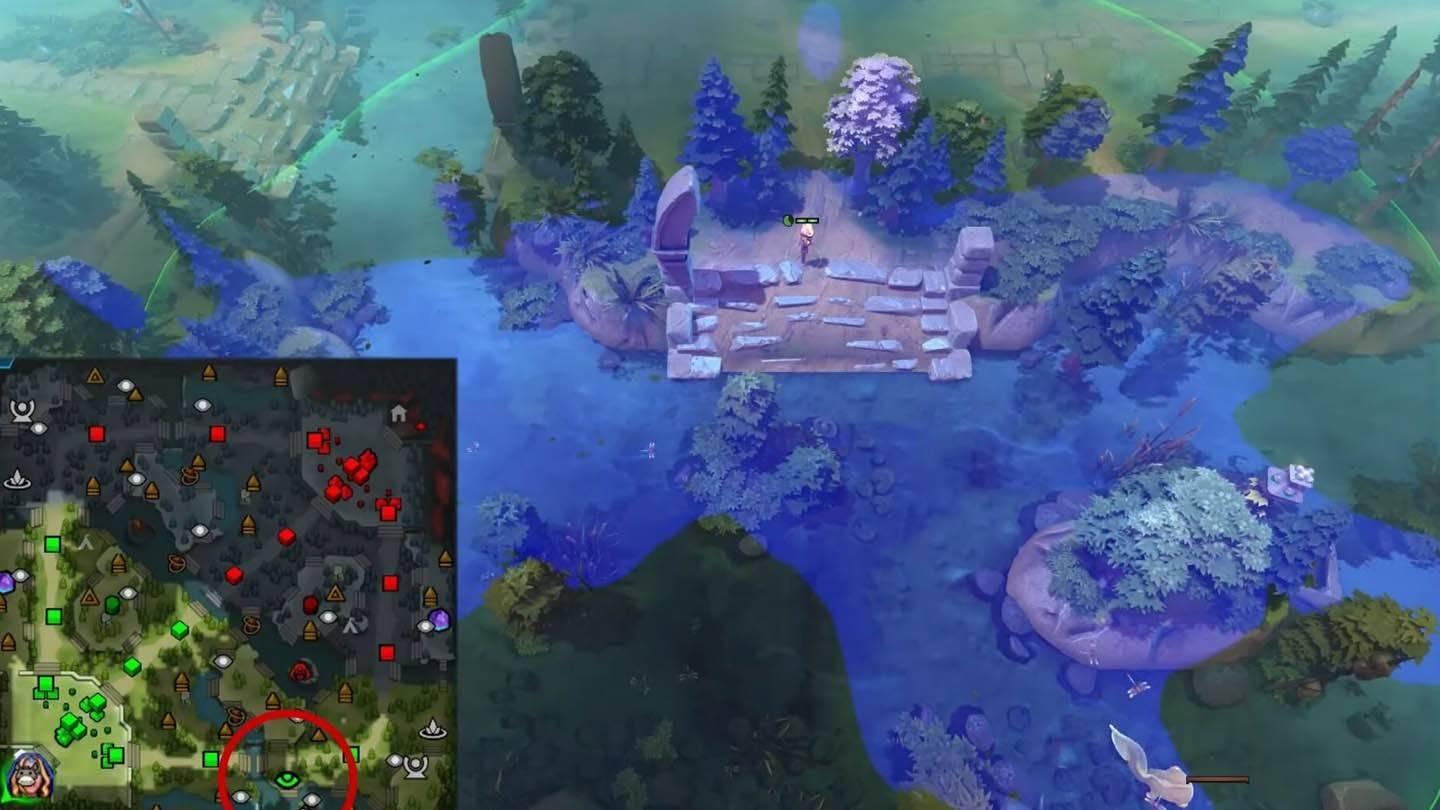
Image: ensigame.com
Ambush Preparation: This ward gives vision into foggy areas near the Dire's bottom tier two tower, assisting in setting up ganks and ambushes.
Expert Advice: Use this ward in conjunction with smoke to execute surprise attacks.
Radiant Roshan Pit Entrance
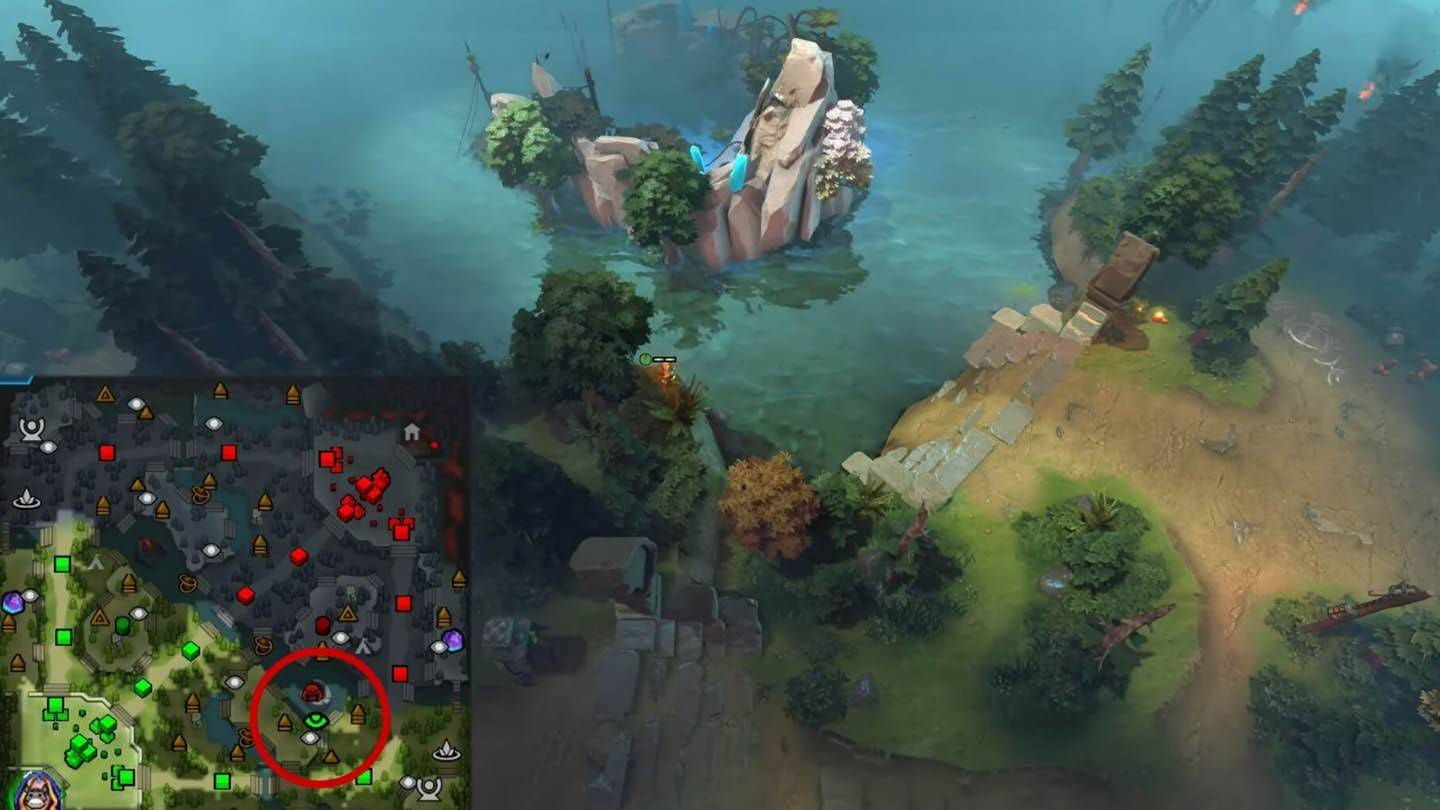
Image: ensigame.com
Timing is Everything: This ward enables early detection of Roshan attempts from the Radiant side, allowing for timely responses and potential counter-attacks.
Tactical Insight: Rotate this ward frequently to maintain the element of surprise.
Dire Mid Lane High Ground
Image: ensigame.com
Elevated Awareness: Offering extended vision along the middle lane high ground, this ward improves awareness of approaching enemies.
Strategic Note: Ideal for controlling the mid lane during crucial moments.
Radiant Top Tier 2 Backdoor Path
Image: ensigame.com
Security First: This ward monitors backdoor paths leading to the Radiant's top tier two tower, preventing surprise attacks.
Defensive Tip: Place a Sentry ward nearby to catch sneaky invis heroes.
Dire Bottom Ancient River Bend
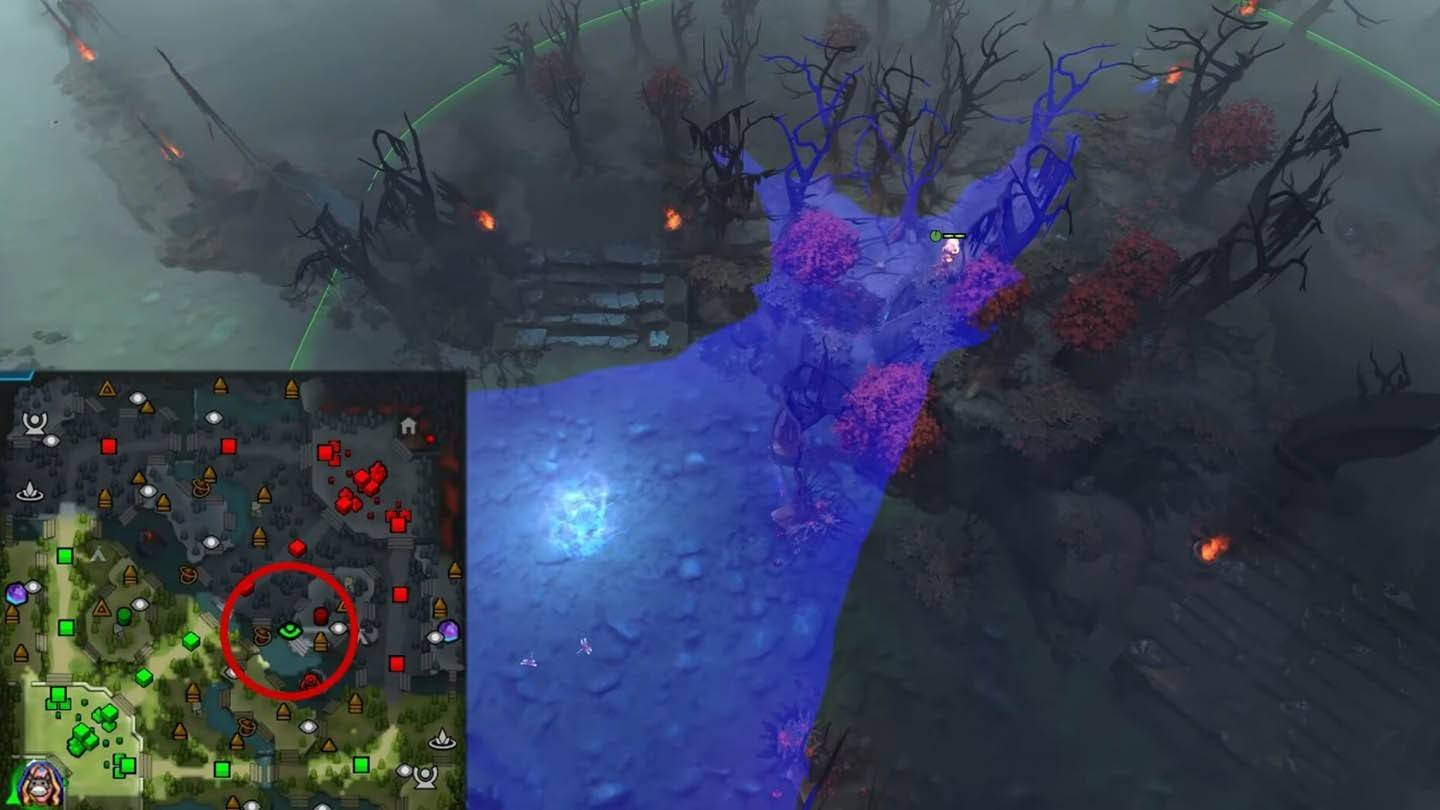
Image: ensigame.com
Deep Vision Mastery: Providing deep vision into the Dire's base through an unconventional river bend location, this ward showcases creative thinking.
Advanced Placement: Experiment with slight adjustments to find optimal coverage.
Radiant Mid Lane Jungle Passage
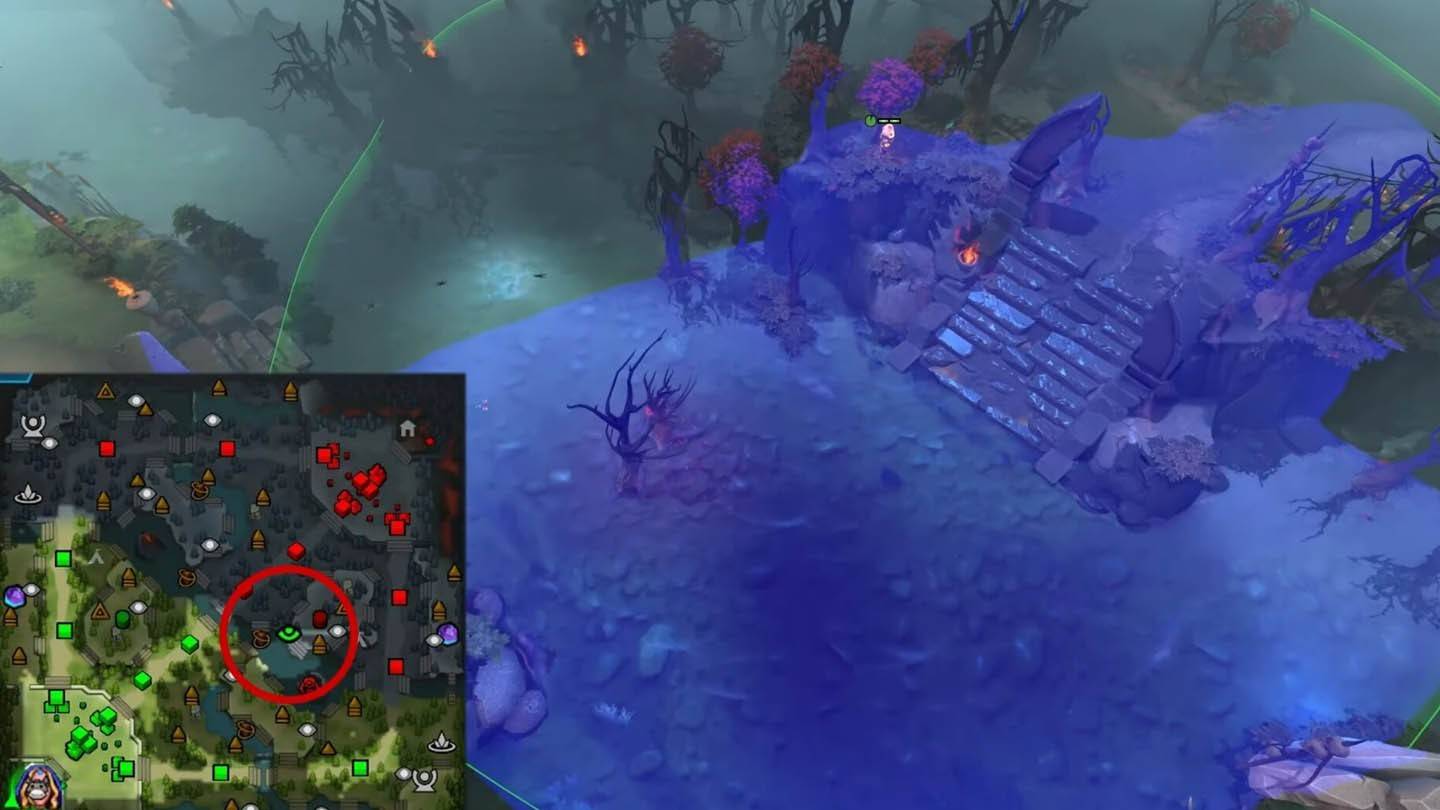
Image: ensigame.com
Comprehensive Coverage: This ward reveals key jungle passages adjacent to the mid lane, enhancing overall map awareness.
Professional Recommendation: Rotate between different jungle entrances for maximum effect.
Dire Top Secret Shop Approach
Image: ensigame.com
Economic Surveillance: This ward alerts when enemies are heading towards or leaving the Dire's secret shop area, offering economic intelligence.
Competitive Edge: Use this information to time your pushes effectively.
Radiant Bottom Tier 3 Side Path
Image: ensigame.com
Flank Detection: This ward monitors side paths leading to the Radiant's bottom tier three tower, warning against flanking maneuvers.
Team Coordination: Share this vision with your team for coordinated responses.
Dire Roshan Pit Exit
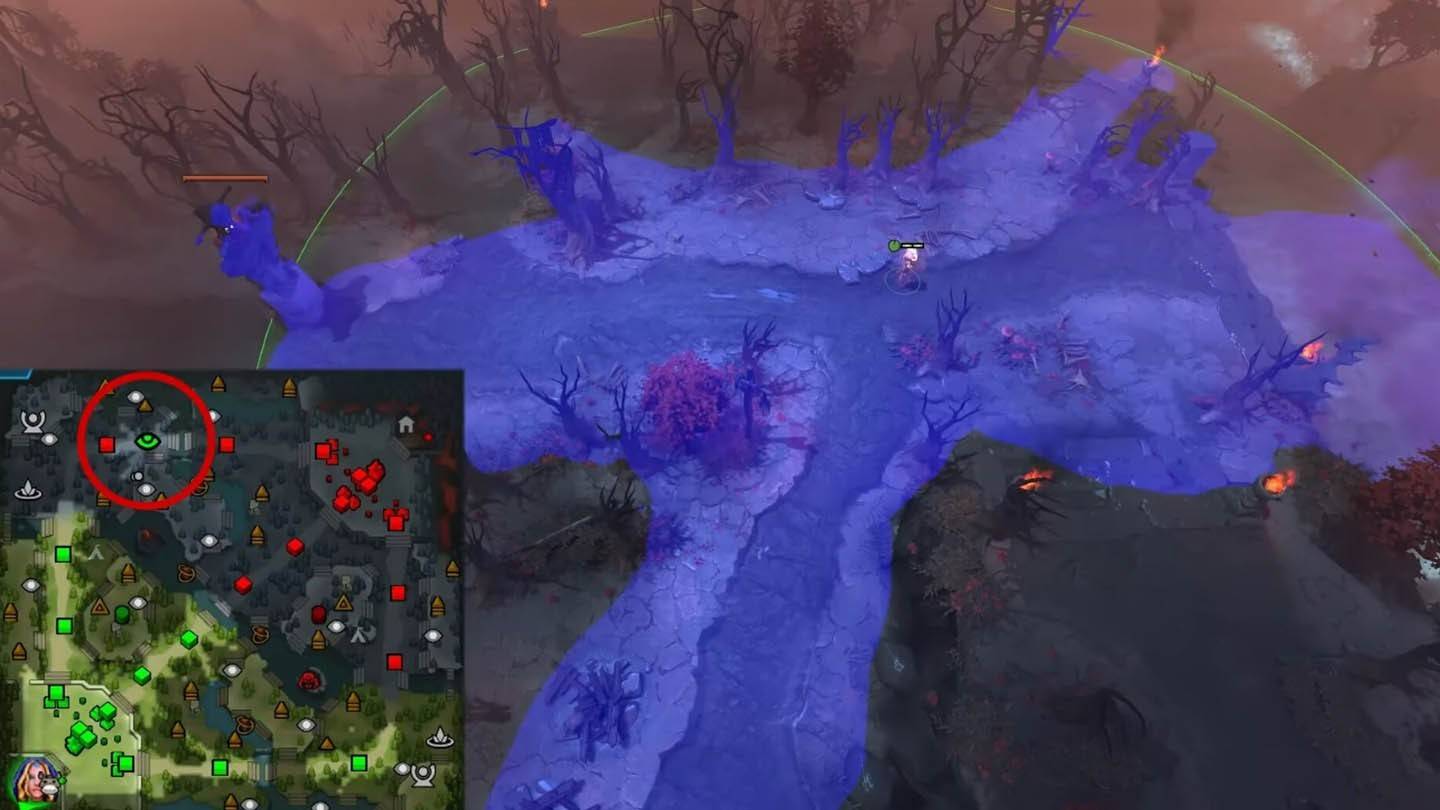
Image: ensigame.com
Counterplay Opportunity: This ward detects enemy movements exiting the Roshan pit from the Dire side, facilitating timely reactions.
Strategic Positioning: Essential during late-game Roshan battles.
Radiant Top Ancient Cliffside
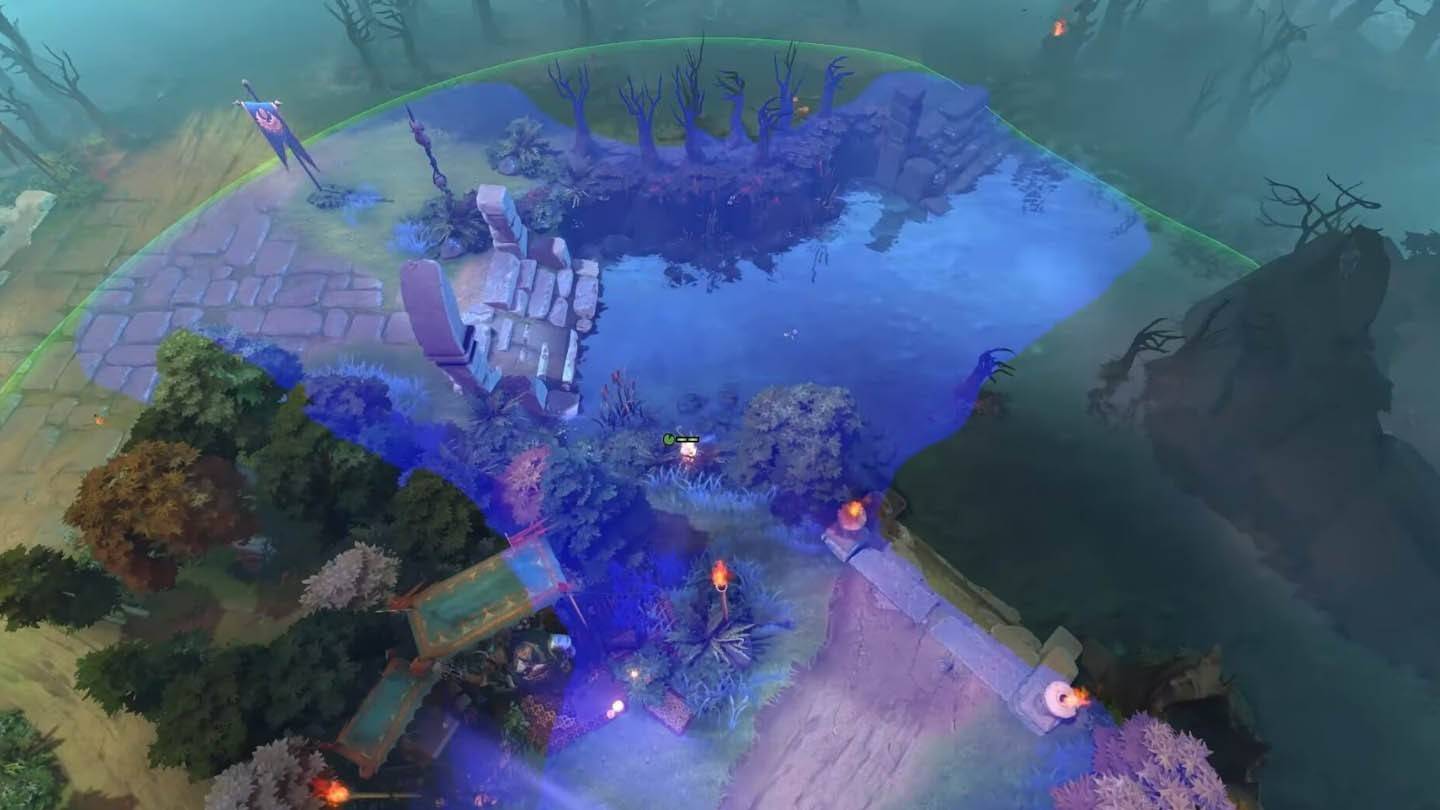
Image: ensigame.com
Hidden Vantage Point: This ward offers hidden vision into the Radiant's base from a cliffside vantage point, surprising opponents.
Elite Placement: Requires precise execution for best results.
Dire Mid Lane Jungle Overlook
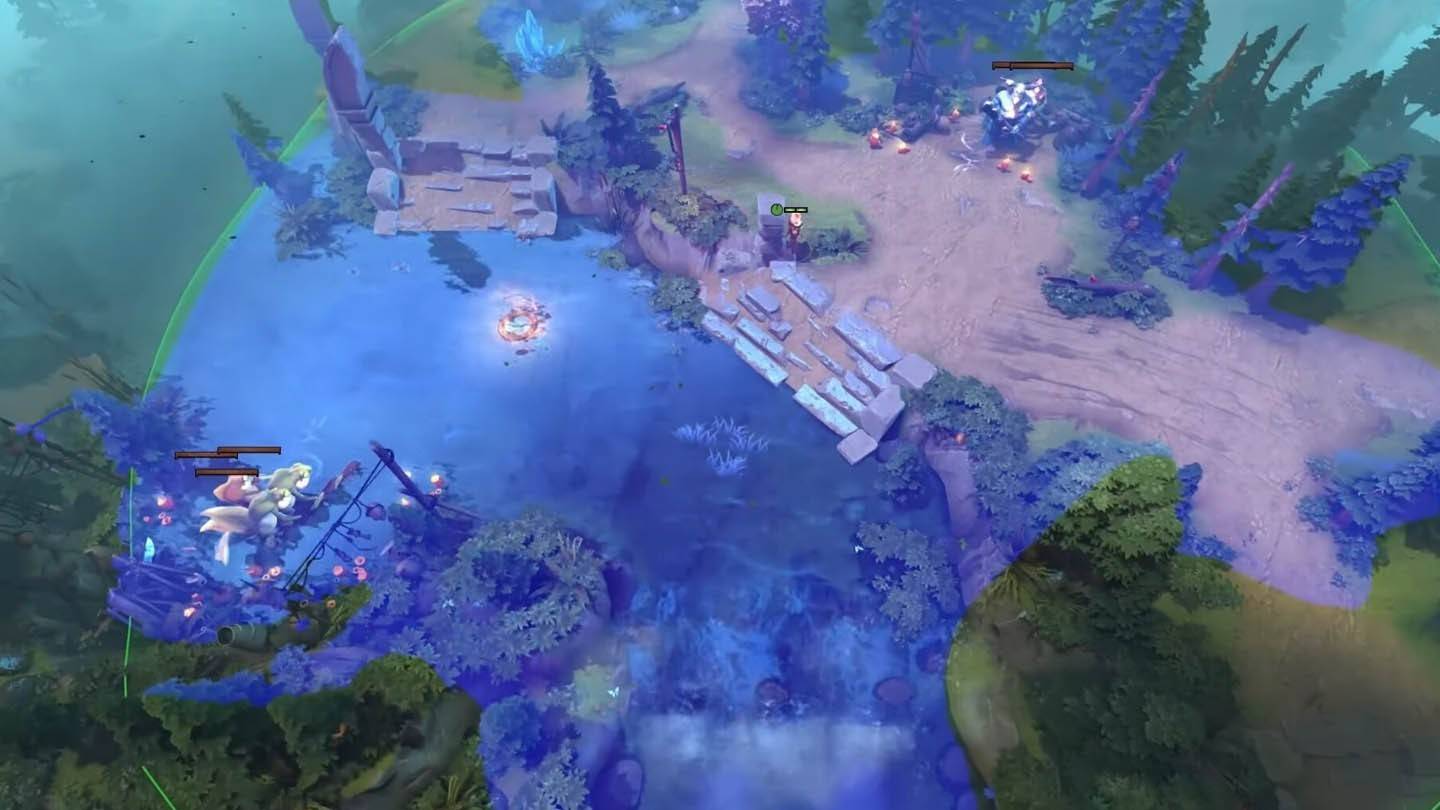
Image: ensigame.com
Elevated Advantage: This ward provides elevated vision over the Dire's mid lane jungle region, improving situational awareness.
Advanced Technique: Combine with other mid lane wards for comprehensive coverage.
Radiant Bottom Tier 2 Rear Flank
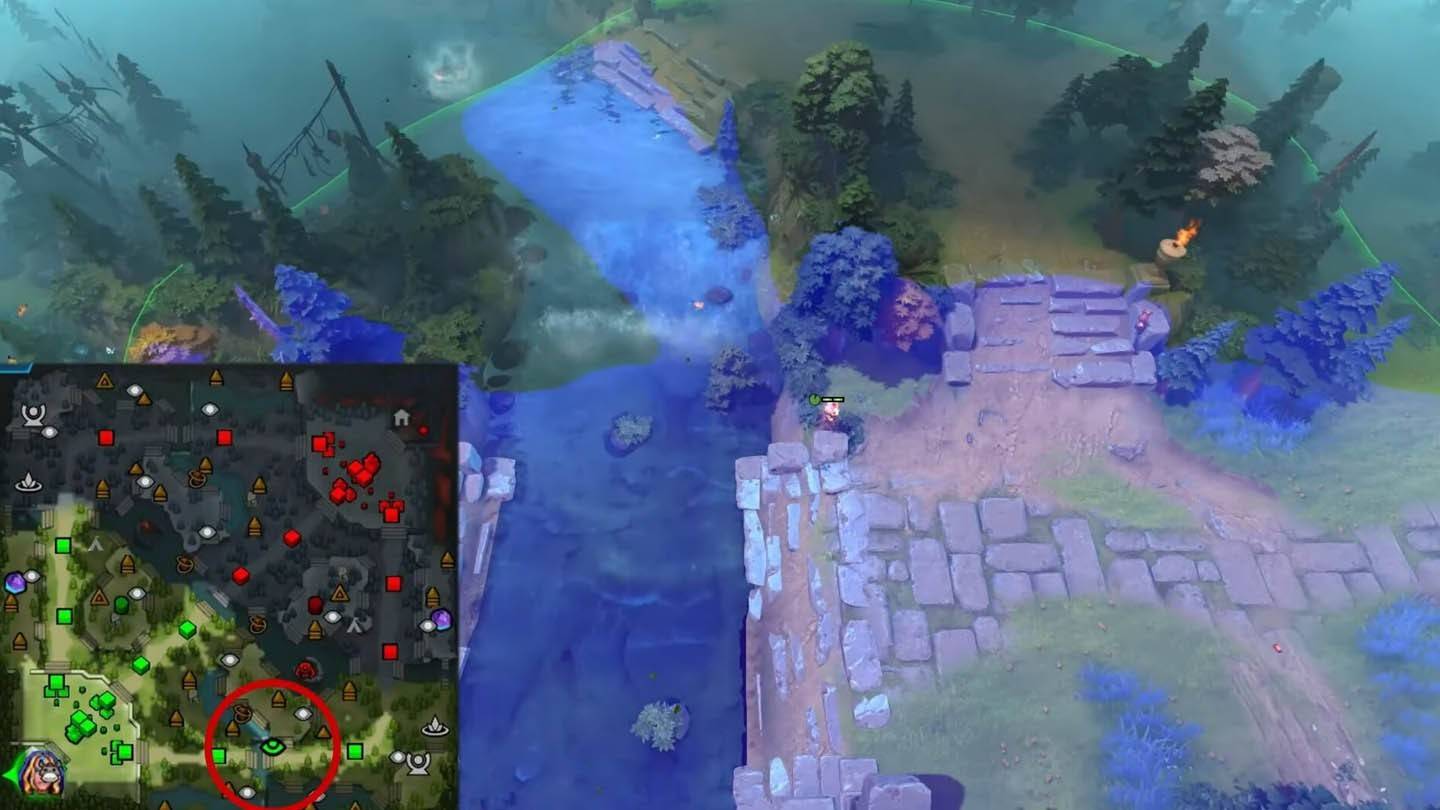
Image: ensigame.com
Preventive Measures: This ward monitors rear flanks near the Radiant's bottom tier two tower, preventing sneak attacks.
Defensive Mastery: Critical for maintaining tower integrity.
These cutting-edge ward placements represent the pinnacle of professional vision control in Dota 2. By studying and implementing these strategies, you'll gain a significant advantage in both casual and competitive play. Remember, effective warding isn't just about placing observers - it's about understanding the nuances of map control and adapting to evolving situations.
-
 Dec 25,24Zenless Zone Zero 1.5 Update Preview Zenless Zone Zero Version 1.5 Update: Leaked Banner Characters Revealed New leaks for Zenless Zone Zero unveil the character lineup for the upcoming Version 1.5 update, including highly anticipated character reruns. This HoYoverse action RPG continues to expand its roster of powerful characters, fr
 -
 May 06,25Magic Chess: Beginner's Guide to Mastering Core Mechanics Magic Chess: Go Go, an exhilarating auto-battler strategy game crafted by Moonton, is deeply rooted in the vibrant universe of Mobile Legends. This game masterfully blends chess tactics with hero-based strategies, offering players the chance to craft formidable team line-ups featuring heroes from th
 -
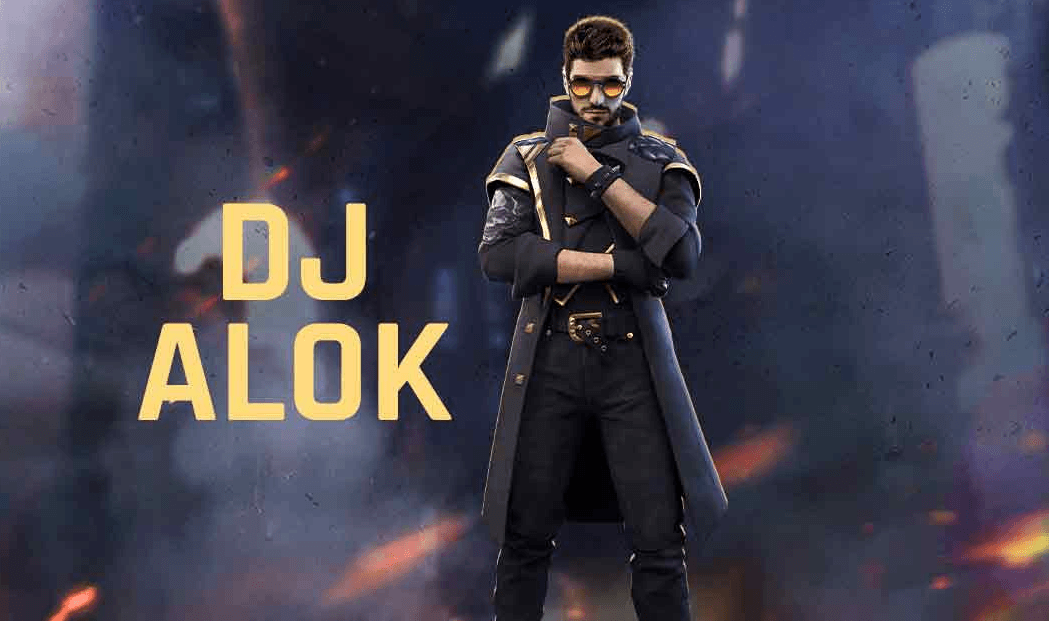 Apr 08,25Top Free Fire Characters 2025: Ultimate Guide Free Fire, crafted by Garena, has cemented its status as a top-tier battle royale game worldwide, amassing over 1 billion downloads on the Google Play Store and engaging millions of daily active players. Its appeal lies not only in its thrilling gameplay but also in its diverse array of characters,
 -
 Apr 11,25"Top Heroes Tier List for Puzzles & Survival in 2025" A tier list for Puzzles & Survival is an essential tool for players looking to optimize their gameplay. It helps in identifying the most effective heroes for various game modes, such as match-3 battles, base defense, and PvP combat. Given the game's wide array of heroes, ranking them according to th